

Are you a beginner to web development who wants to learn how APIs work? Or heard a lot about APIs but don't know what that is? Or just a minion fan who wants to know what can be a sentence translation into their language.
If you are any one of these, then this article is for you. We will learn what is an API, how to work with them by creating a simple translation application.
Pre-requisites
- Basic knowledge of HTML and CSS
- Knowledge of DOM Model
- Knowledge of Event Handling in JavaScript
- Any code editor
- Any browser

Create an HTML file "index.html" where we create the structure of the application.
<html lang="en" dir="ltr">
  <head>
    <meta charset="utf-8" />
    <title>banana talk</title>
  </head>
  <body>
  <script
      type="text/javascript"
      src="https://code.responsivevoice.org/responsivevoice.js?key=jLpWGGe5"
    ></script>
    <nav>
      <div style="padding: 1rem; font-size: 2rem; font-weight: bold;">
        banana talk
      </div>
    </nav>

    <main>
      <div style="float: left;">
        <img src="images/minion.png" alt="minion" class="minion-image" />
      </div>
      <textarea
        id="translation-input"
        placeholder="Put your message here which you want to convert to banana language"
      ></textarea>

      <button id="translation-button" name="button">
        Translate To Banana
      </button>

      <div class="paragraph">
        Translation will come here 👇
      </div>

      <div id="translation-output"></div>

      <button id="translation-button-speak" name="button">
        Listen To Banana
      </button>
    </main>

    <footer>
      <div class="about">
        about
      </div>
      <p>
        Are you a fan of minions? Did you know that the gibberish they say is an
        actual language. Use the translator to convert your text from English to
        Minion speak or Banana language.
      </p>
    </footer>

    <script src="app.js" charset="utf-8"></script>
  </body>
</html>
Create a "styles.css" to style our page.
@import url("https://fonts.googleapis.com/css2?family=Noto+Sans:ital@1&display=swap");

:root {
  --primary-color: #f2c94c;
  --text-color: black;
}

body {
  margin: 0;
  font-family: "Noto Sans", sans-serif;
}

nav {
  background-color: var(--primary-color);
  text-align: center;
}

nav div {
  display: block;
}

main {
  text-align: center;
}

.minion-image {
  height: 25rem;
  margin-left: 12rem;
}

main textarea {
  margin: auto;
  margin-top: 2rem;
}

#translation-input {
  display: block;
  height: 20vh;
  width: 40%;
  font-family: inherit;
  font-size: 1rem;
}

main button {
  margin-top: 1rem;
}

#translation-button,
#translation-button-speak {
  background-color: var(--primary-color);
  text-align: center;
  padding: 1rem;
  font-family: inherit;
  font-size: large;
}

.paragraph {
  padding: 1rem;
  padding-bottom: 0;
  font-size: large;
}

#translation-output {
  border: 1px solid var(--text-color);
  text-align: left;
  box-sizing: border-box;
  margin: auto;
  display: block;
  min-height: 10vh;
  max-height: 20vh;
  width: 40%;
  font-family: inherit;
  font-size: 1rem;
  overflow: scroll;
  padding: 1rem;
  font-size: large;
}

.about {
  font-size: x-large;
}

footer {
  position: fixed;
  width: 100%;
  text-align: center;
  background-color: var(--primary-color);
  bottom: 0;
  padding-top: 1rem;
  padding-bottom: 1rem;
}

footer p {
  max-width: 600px;
  margin: auto;
}

p {
  display: block;
  margin-block-start: 1em;
  margin-block-end: 1em;
  margin-inline-start: 0;
  margin-inline-end: 0;
}
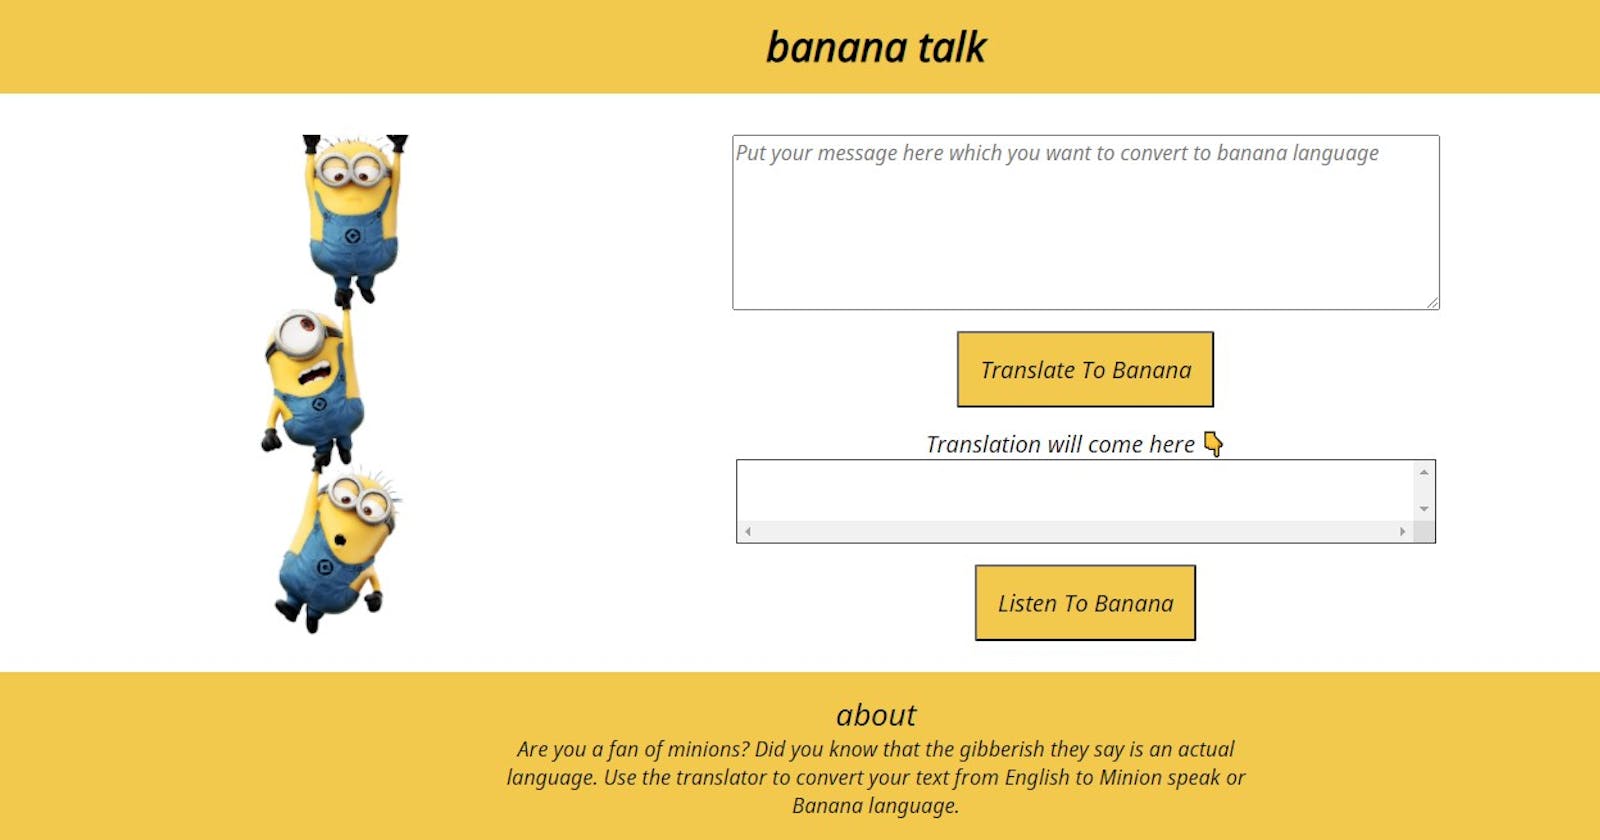
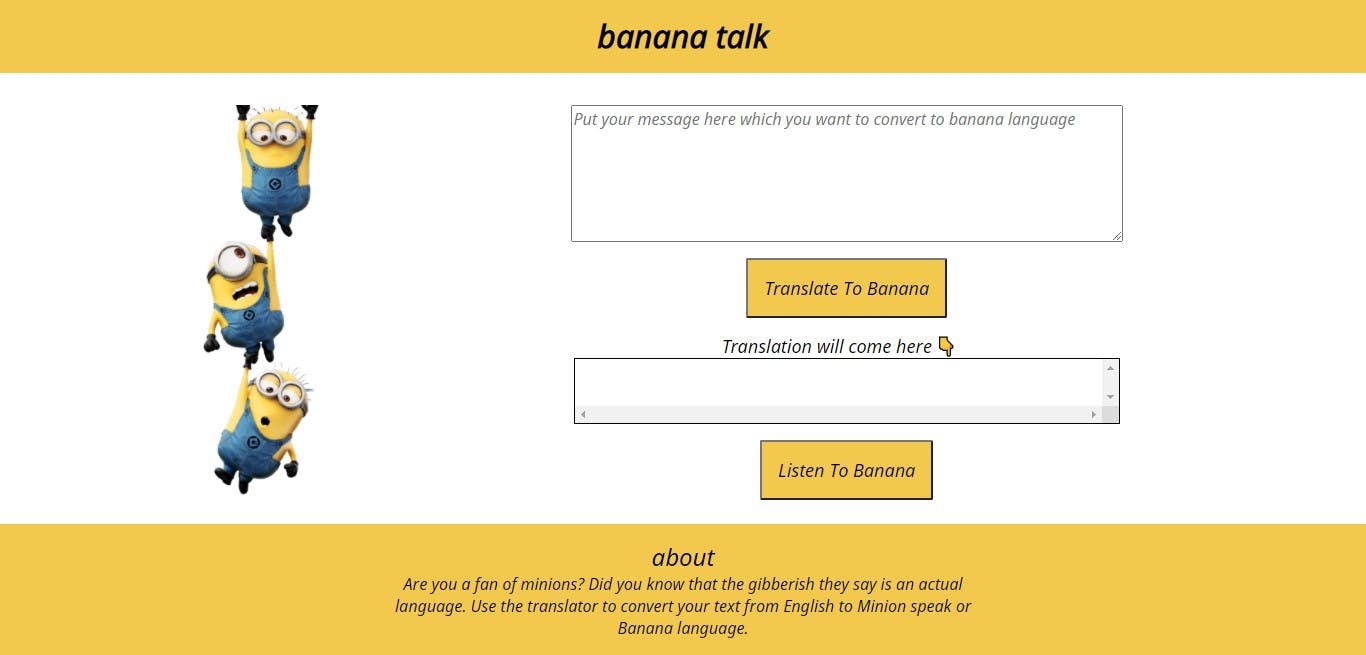
After styling your application will look something like this 👇
Now, let's add some responsiveness to our application.
@media (min-width: 200px) and (max-width: 800px) {
  main {
    margin-top: 2rem;
  }

  .minion-image {
    display: none;
  }

  #translation-input {
    height: 5rem;
    width: 20rem;
    font-size: 0.8rem;
  }

  #translation-button,
  #translation-button-speak {
    font-size: 1rem;
    padding: 0.5rem;
    margin-top: 2rem;
  }

  .paragraph {
    margin-top: 1rem;
  }

  #translation-output {
    height: 5rem;
    width: 20rem;
  }

  footer p {
    max-width: 400px;
  }
}
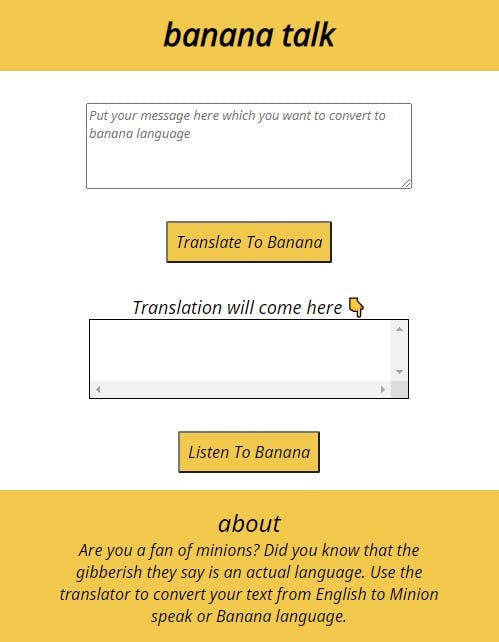
It will look something like this after adding media query for all the screens which have a width between 200px to 800px👇
Now, before moving forward to add functionality to the application. Let's first understand what is an API and how to use it.
So, in simple terms, an API is itself a program through which two programs can communicate with each other.
Now, we will learn how to use it. I'm using Fun Translations API. If you look in the documentation of it.
https://api.funtranslations.com/translate/minion.json
This is the full URL that we use and we add "text" to it that we need to translate. Let's understand with the help of an example.
If the above call is successful then you will get a JSON object.
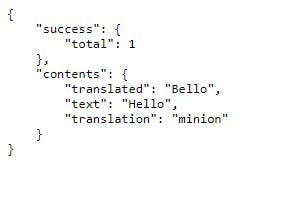
Now, we just need to fetch that "translated" property from the object and output it.
How do we dot it?
The answer is using fetch() method. What is it?
fetch() call takes URL as an argument and returns a promise. Promise that it will give the result as soon as it gets it. This is called asynchronous programming where you don't want your user to not be able to do anything while the browser is getting data.

If you open your console and put the URL in the fetch method you will get pending promise as you can see above.
Now, why it is pending? Because we didn't tell the fetch call what to do when you get the data.
This is where .then() and .catch() comes into picture.
then() returns a promise and takes two arguments: callback functions for success and failure of Promise.
catch() returns a promise and deals with failure cases only.
Now, let's understand with the example.
fetch("https://api.funtranslations.com/translate/minion.json"+"?"+"text=hello")
.then(response => response.json())
.then(json => console.log(json))
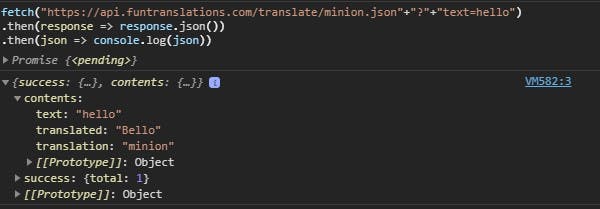
If the request will successful you will get the JSON object as we discussed before.
Now, what happens if we break the fetch call.
fetch("https://api.funtranslations.com/translate/minion.json"+"?"+"texthello")
Suppose, I remove "=" after the text. What will happen now?
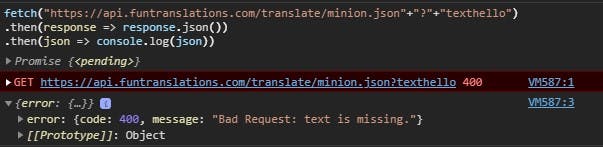
You will get a bad request error. This is where catch() comes into the picture. We can catch the error and display some meaningful output to the user that the code gets a break because of some reason.
Now, we know everything that we need to know. let's create the app now.
Create "app.js" file.
var btnTranslate = document.querySelector("#translation-button");
var translationText = document.querySelector("#translation-input");
var outputText = document.querySelector("#translation-output");
Selecting all the ids to work on them.
var res= "https://api.funtranslations.com/translate/minion.json";

function getTranslationalURL(text) {
  let URL = res+ "?" + "text=" + text;
  return encodeURI(URL);
}
The above function will take the text that we enter in the first textarea and append it with the URL and encode it using encodeURI() function.
What does this function do and why it is important?
It encodes special characters except: , / ? : @ & = + $ #. It helps to make the transmitted data more secure and reliable.
function errorHandler(err) {
  console.log("error occurred" + err);
  alert("something wrong with the server! try again after some time");
}
The above function will catch the error when promises get rejected due to any reason like because limited API requests per day.
btnTranslate.addEventListener("click", clickHandler);
We are adding an event listener to our "translate to banana" button which is taking "clickHandler" function as a callback.
Now, what this function will do?
The things we discussed above.
function clickHandler() {
  var inputText = translationText.value;
  fetch(getTranslationalURL(inputText))
    .then((response) => response.json())
    .then((json) => {
      var translatedText = json.contents.translated;
      outputText.innerText = translatedText;
    })
    .catch(errorHandler);
  translationText.value = "";
}
We are taking text using "translationText.value" and use it as an argument in the getTranslationalURL() function which in turn is the argument of fetch call.
Now, instead of console.log the response we have to show that "translated" property's value in another text box. We are using dot notation for accessing the property.
Then taking the value and using "innerText" property writing it back to the text box.
.catch() is catching the rejected case and after that, we want to empty the input field.
translationText.value = "";
It is doing that.
That's it, we have successfully created an app using API.
I have used one more API for the voice feature. It's called ResposiveVoice Text to Speech API. It's easy to use. You just have to sign in to get the unique key and you can successfully use it in your project.

You can find the complete GitHub source code in this repository.
You can see the live demo of the deployed application here.
P.S. Fun translations API takes 5 requests every day. So, if it shows any error while translation means the free limit got exhausted. You can try the next day.
Furthermore, if you have any doubts. You can connect with me on:
I would love to discuss more on this. 😊