Create a Simple Chrome Extension using HTML and CSS

I am a front end engineer who loves to code and built web apps.
Are you a person who is more addicted to his/her laptop than your phone? Or, a person who has the habit of checking their social media accounts very frequently?
Or, a coder who always thinks that how chrome extensions are made but never tried to make their own. I was all of it. So, I made a simple chrome extension with HTML and CSS to keep all my frequently used social accounts in one place and named itAll-in-One Launcher.
Pre-requisites:
- any code editor
- knowledge of HTML and CSS
- chrome browser

- To create a chrome extension, we first need to create a
manifest.jsonfile.
{
  "manifest_version": 2,
  "name": "All-in-One Launcher",
  "version": "1.0.0",
  "description": "Quick Launch all your social media accounts",
  "browser_action": {
    "default_popup": "popup.html"
  },
  "permissions": ["activeTab"]
}
So, what is manifest.json file? This file gives various information about the extension to chrome.
manifest_version: this tells the chrome that the associated extension will support the current version of it or the future versions.
name: this tells the name of your extension.
version: this tells the version of your extension.
browser_action: it is a popup that adds up to the chrome toolbar whose content is specified using HTML, CSS, and JavaScript.
permissions: it’s a message displayed when you install a chrome extension. It will ask for the permission on accessing or changing information.
- Next, let's create a HTML file
popup.htmlwhose contents will be visible on the popup.
<!DOCTYPE html>
<html lang="en" dir="ltr">
  <head>
    <meta charset="utf-8" />
    <link rel="stylesheet" href="styles.css" />
    <link
      href="https://maxcdn.bootstrapcdn.com/font-awesome/4.7.0/css/font-awesome.min.css"
      rel="stylesheet"
      integrity="sha384-wvfXpqpZZVQGK6TAh5PVlGOfQNHSoD2xbE+QkPxCAFlNEevoEH3Sl0sibVcOQVnN"
      crossorigin="anonymous"
    />
    <title>All-in-One Launcher</title>
  </head>
  <body>
    <div class="modal-header">
      <h1 class="brand">
        All-in-One Launcher <span class="version">(1.0.0)</span>
      </h1>
    </div>
    <div class="modal-icons">
      <div class="flex-container">
        <div class="flex">
          <a
            href="https://nikita-agarwal-portfolio.netlify.app/"
            target="_blank"
            ><i class="fa fa-globe"></i
          ></a>
        </div>
        <div class="flex">
          <a href="https://youtube.com" target="_blank"
            ><i class="fa fa-youtube"></i
          ></a>
        </div>
        <div class="flex">
          <a href="https://github.com/29nikita" target="_blank"
            ><i class="fa fa-github"></i
          ></a>
        </div>
        <div class="flex">
          <a
            href="https://www.linkedin.com/in/nikita-agarwal-443453118/"
            target="_blank"
            ><i class="fa fa-linkedin"></i
          ></a>
        </div>
        <div class="flex">
          <a href="https://twitter.com/NikitaA20335037" target="_blank"
            ><i class="fa fa-twitter"></i
          ></a>
        </div>
      </div>
    </div>
  </body>
</html>
So to embed different icons I use Font Awesome. It's an icon and font toolkit and easy-to-use.
- Now, let's style our HTML file using CSS. Create a
styles.cssfile.
@import url("https://fonts.googleapis.com/css2?family=Roboto:wght@300;400&display=swap");

html,
body {
  background-color: #fef2f2;
  font-family: "Roboto", sans-serif;
  font-size: 14px;
  margin: 0;
  min-height: 150px;
  padding: 0;
  width: 384px;
}

:root {
  --primary-color: #f87171;
}

h1 {
  /*font-family: "Menlo", monospace; */
  font-size: 22px;
  font-weight: 400;
  margin: 0;
  color: var(--primary-color);
  text-align: center;
}

a:link,
a:visited {
  color: #000000;
  outline: 0;
  text-decoration: none;
}

.modal-header {
  align-items: center;
  border-bottom: 0.5px solid var(--primary-color);
}

.modal-content {
  padding: 0 22px;
}

.modal-icons {
  border-top: 0.5px solid var(--primary-color);
  height: 50px;
  width: 100%;
}

.brand {
  padding: 16px;
}

.version {
  color: var(--primary-color);
  font-size: 18px;
}

.flex-container {
  display: flex;
  justify-content: space-between;
  padding: 10px 22px;
}

.flex {
  opacity: 1;
  transition: opacity 0.2s ease-in-out;
  width: 100px;
}

.flex:hover {
  opacity: 0.4;
}

.flex .fa {
  font-size: 40px;
  color: var(--primary-color);
}
I have chosen Roboto font for my extension. You can choose any font of your choice using google fonts.
And bingo, we have done with the coding part. Now, we just need to upload it in chrome.
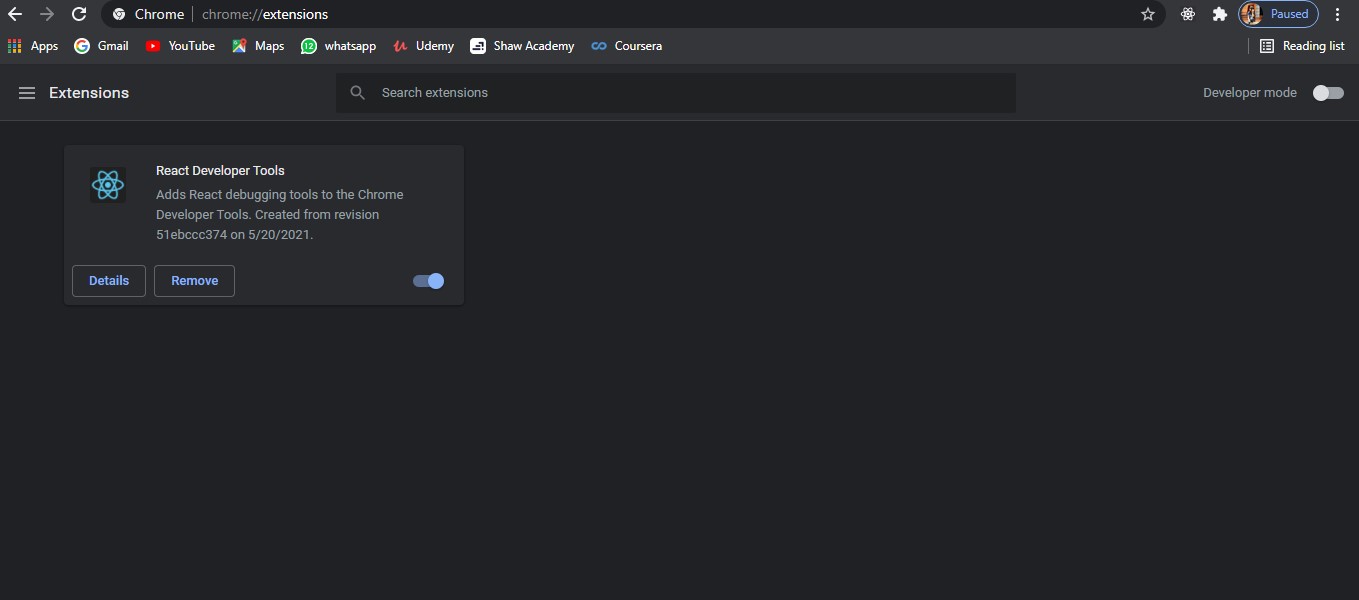
- Open Chrome browser and type
chrome://extensionsin the search bar. You will see something like this. 👇
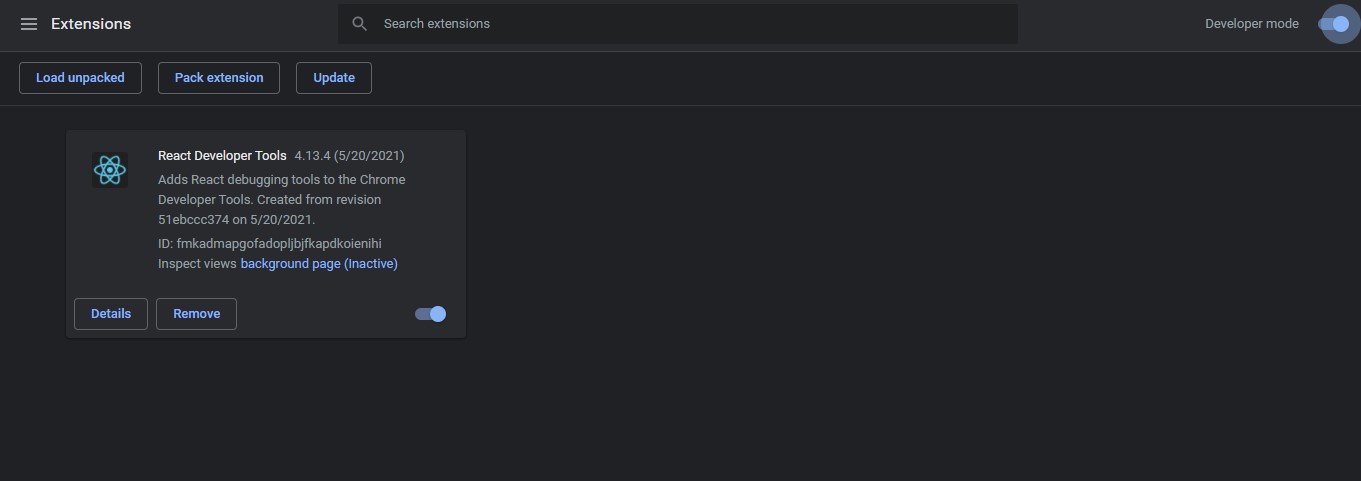
Now, you just need to turn on the
Developer modewhich you are seeing at the top-right corner in the above image.When you will turn it on. You will see three options. Something like this 👇
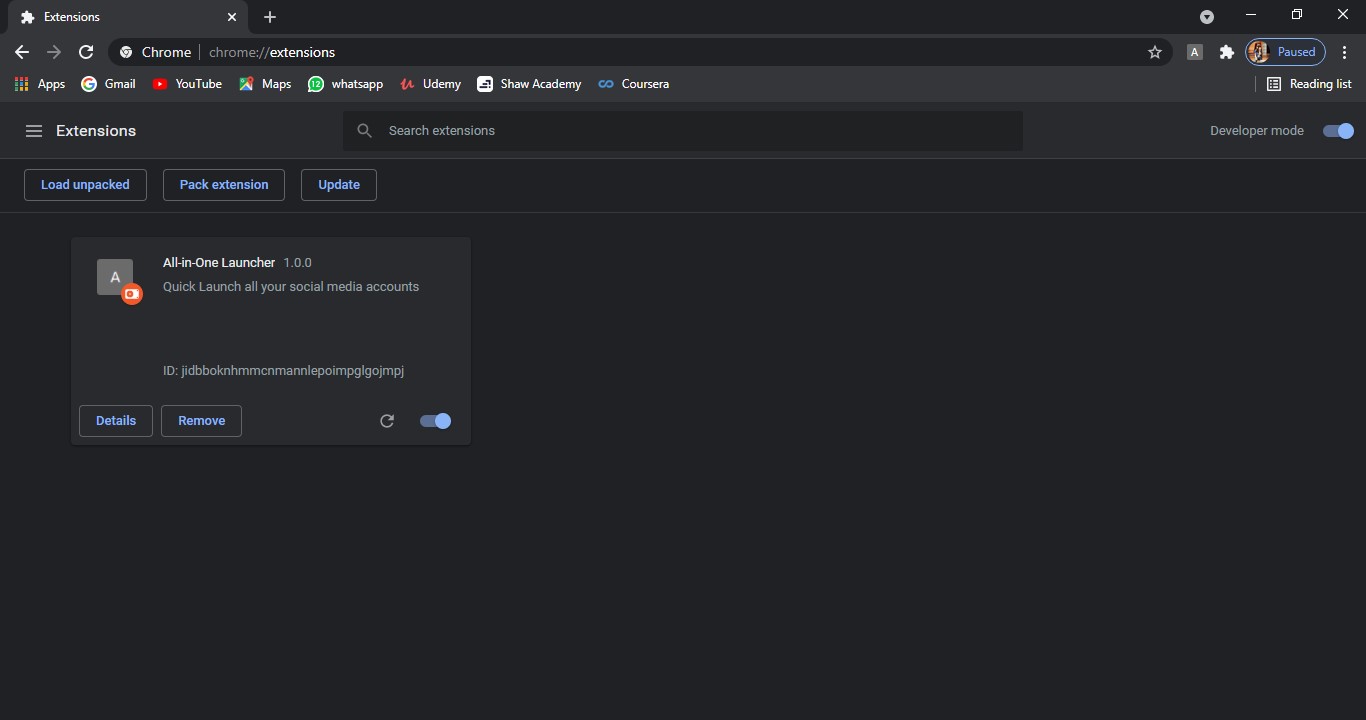
You just need to click on load unpacked. A dialog box will be opened. Just got to the path where your project folder exists and select it. Then, it will display something like this.
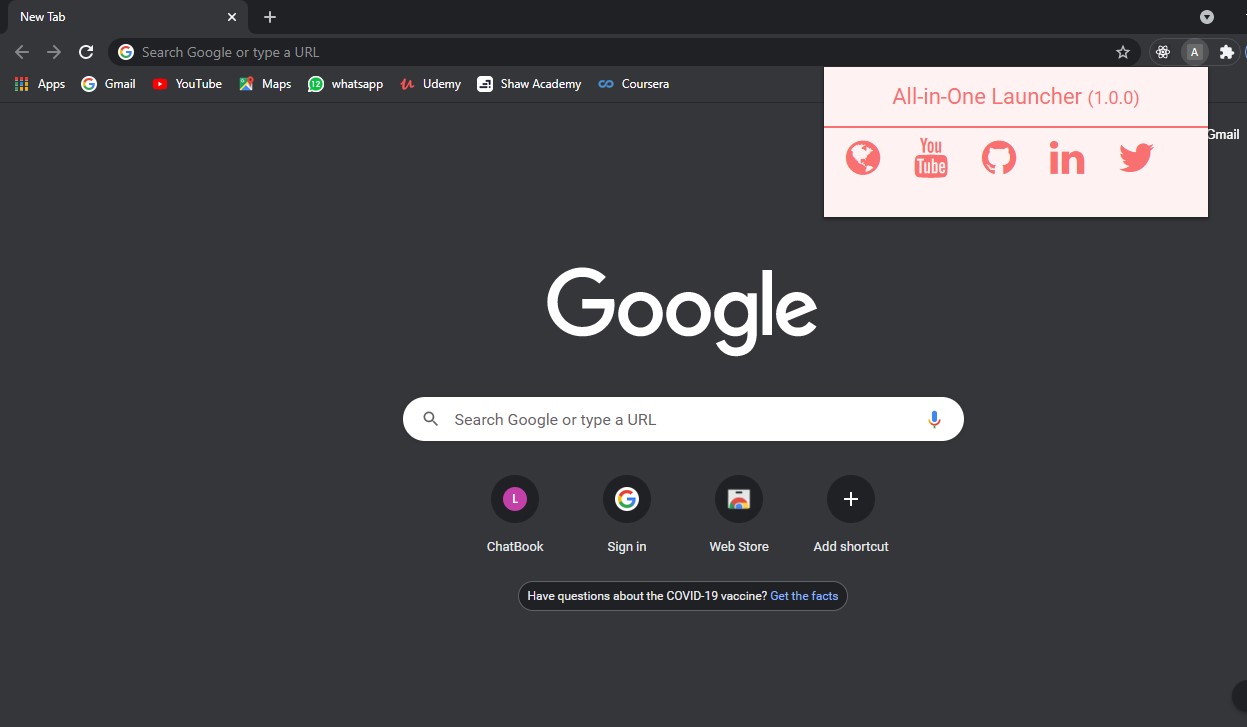
Bingo! Now you can successfully use the chrome extension locally.
If you want that other person to also uses your chrome extensions then you need to deploy it on the chrome web store.
Thanks for reading! 😊
You can find the whole code in the Github repository.


